
Only this week -0% For Stencils & PCB Work

Starting a Phone Repair Business in Kenya? These Are the Tools You Actually Need

Starting a mobile phone repair business in Kenya can be an exciting opportunity, but buying equipment for your workshop can quickly become expensive.

Walk into an electronics tools shop and you’ll find soldering stations, hot air rework machines, multimeters, microscopes, repair kits, PCB holders and dozens of smaller accessories. Everything looks useful when you’re starting out.

But do you need all of it immediately?

Not necessarily.

The smarter approach is to build your toolkit around the repairs you intend to offer. Start with reliable essentials, understand what each tool does and invest in specialised equipment as your skills and customer base grow.

Whether you’re planning a small repair shop in Nairobi CBD, setting up a workstation from home or upgrading an existing business, here’s a practical guide to the tools worth considering.

1. Precision screwdriver set

A screwdriver set is one of the first purchases for any phone repair technician.

Modern smartphones use different screw types and sizes. Using the wrong screwdriver can damage screw heads, make disassembly difficult and potentially damage the device.

Look for a kit containing:

  • Precision Phillips screwdrivers.
  • Pentalobe screwdrivers.
  • Torx screwdrivers.
  • Suitable flat-head and other specialised bits.
  • Comfortable handles.
  • A storage case that keeps bits organised.

Different phone brands and models use different fasteners, so check that your kit supports the devices you expect to service.

A reliable screwdriver set is useful for everyday repairs, including screen replacement, battery replacement and other device disassembly procedures.

2. Opening tools and precision tweezers

Phone repair involves handling delicate components, connectors, cables and small parts.

Your toolkit should include suitable opening tools and precision tweezers.

Useful accessories include:

  • Plastic opening picks.
  • Spudgers.
  • Opening tools.
  • Suction handles.
  • Fine-point tweezers.
  • Small component-handling tools.

Plastic opening tools are particularly useful when separating suitable phone components because they can reduce the risk of scratching or damaging surfaces compared with inappropriate metal tools.

Tweezers help with positioning small components and handling delicate parts. Choose different tip shapes according to the work you perform.

Avoid using excessive force when opening devices. Modern phones often contain fragile flex cables, adhesive-backed components and tightly fitted assemblies.

3. A quality multimeter

A multimeter is an essential diagnostic tool for a technician who wants to investigate electrical faults rather than simply replace parts.

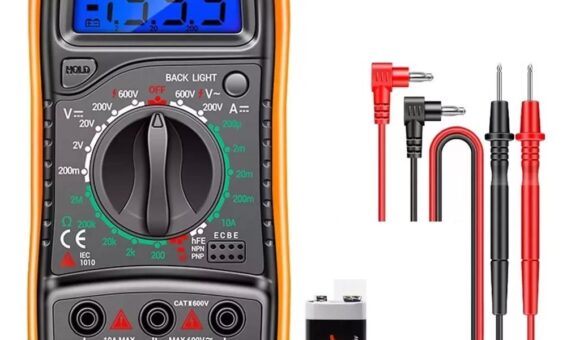
It can help you measure voltage, resistance and current, perform continuity checks and use diode-test functions.

When buying a multimeter, consider:

  • DC voltage measurement.
  • Resistance measurement.
  • Continuity testing.
  • Diode mode.
  • Suitable measurement ranges.
  • Probe quality.
  • Input protection and safety ratings.

A multimeter becomes particularly useful when investigating charging problems, suspected short circuits, damaged connections and other electrical faults.

You don’t necessarily need the most expensive model when starting out. However, choose one with dependable measurements and suitable protection for the work you intend to perform.

For a more detailed buying guide, read Best Multimeters for Mobile Phone Repair Technicians.

4. Soldering station

If you plan to handle board-level repairs, a soldering station is an important investment.

It provides controlled heat through a soldering tip and supports tasks such as soldering wires, repairing suitable pads and working with electronic components.

When choosing a station, pay attention to:

  • Adjustable temperature control.
  • Heat recovery.
  • Compatible replacement tips.
  • Handpiece comfort.
  • ESD considerations.
  • Availability of spare parts.

A soldering station should match the type of work you intend to perform. A technician who mainly handles screen and battery replacements may have different requirements from someone specialising in motherboard repair.

If you’re unsure what to buy, read How to Choose a Soldering Station for Mobile Phone Motherboard Repair.

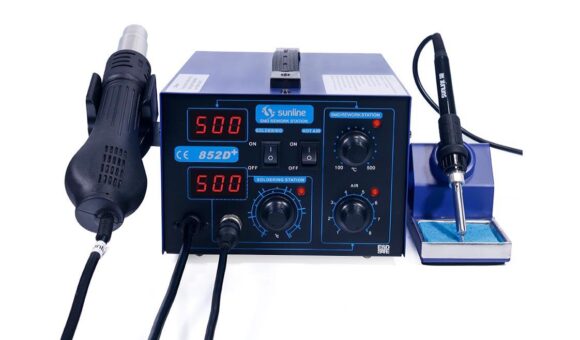
5. Hot air rework station

A hot air rework station uses controlled heated airflow to remove or install suitable surface-mount components.

It becomes particularly useful when your repair work involves motherboard components that are difficult to handle with a conventional soldering iron alone.

Before buying, compare:

  • Temperature adjustment.
  • Airflow control.
  • Available nozzle sizes.
  • Heating performance.
  • Handpiece design.
  • Cooling and safety features.

The correct temperature and airflow depend on the component, motherboard and repair procedure. Poor technique or excessive heat can damage nearby components and the board itself.

If you’re building a motherboard repair toolkit, understand the difference between a hot air rework station and a soldering station before choosing either.

Our guide explains Hot Air Rework Station vs Soldering Station: What’s the Difference?.

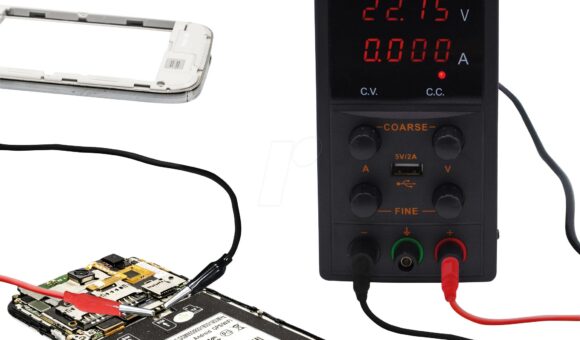
6. DC power supply

A bench DC power supply is useful for technicians who perform electrical diagnostics.

It provides controlled power for suitable testing procedures and allows the technician to observe voltage and current behaviour.

When choosing one, consider:

  • Adjustable voltage.
  • Current limiting.
  • Clear digital displays.
  • Constant-voltage and constant-current operation.
  • Suitable protection features.
  • Stable output.

A DC power supply is not essential for every basic phone repair service. However, it becomes valuable as you expand into motherboard diagnostics and more advanced troubleshooting.

Read How to Choose a DC Power Supply for Mobile Phone Repair before purchasing one.

7. Microscope for precision motherboard work

A microscope helps technicians inspect small components, solder joints, pads and other details that are difficult to see clearly with the naked eye.

If you intend to specialise in micro-soldering, it is one of the tools worth budgeting for.

Look beyond the advertised magnification. Consider:

  • Image clarity.
  • Useful magnification range.
  • Working distance.
  • Field of view.
  • Lighting.
  • Stand stability.

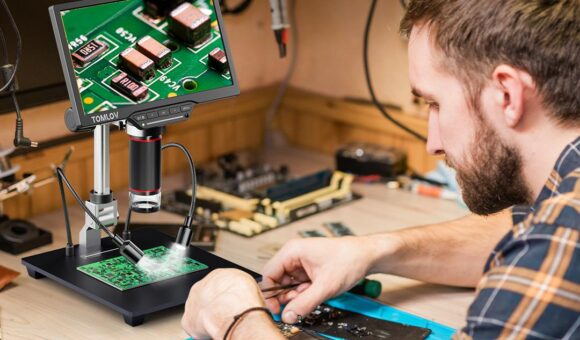
A stereo microscope provides a natural three-dimensional view, while a digital microscope displays the work on a screen.

You can learn more in our guides to choosing a microscope for mobile phone motherboard repair and stereo vs digital microscopes.

If you’re still learning micro-soldering, you can also read How Much Microscope Magnification Do You Really Need for Micro-Soldering?.

8. PCB holder and motherboard clamp

A motherboard needs to remain stable while you’re inspecting or working on it.

A PCB holder or motherboard clamp secures the board and makes it easier to access the repair area.

When choosing one, consider:

  • Grip and stability.
  • Adjustable positioning.
  • Compatibility with different board sizes.
  • Access to both sides where required.
  • Clearance for your microscope and soldering tools.

A suitable holder helps reduce unnecessary board movement during precision work.

For technicians who regularly perform motherboard repairs, this is a practical addition to the workstation rather than an unnecessary accessory.

9. Soldering consumables

Your workshop also needs a reliable supply of consumables.

These are the materials you’ll use repeatedly during repair work, so buying suitable products matters.

Consider keeping:

Solder wire: Used to create soldered electrical connections. Choose a suitable diameter and composition for your applications.

Soldering flux: Helps improve solder wetting and supports controlled soldering.

Solder paste: Used in suitable soldering and rework processes. Its composition and application should match the task.

Desoldering braid: Helps remove excess solder from appropriate pads and connections.

Cleaning materials: Suitable cleaning products help remove flux residues and keep the work area tidy.

Do not assume all fluxes, solder wires or solder pastes are interchangeable. Choose materials according to the repair process and component requirements.

10. Soldering mat and workstation accessories

A repair mat helps organise your working area and provides a defined surface for handling phones, tools and small components.

Look for one with:

  • Enough surface area.
  • Useful compartments for screws and small parts.
  • A surface suitable for your repair processes.
  • Easy cleaning.
  • Clear product specifications.

If ESD protection is important to your work, verify that the mat is designed for that purpose. Not every silicone repair mat is ESD-safe.

You should also consider tool stands, organisers, lighting and suitable fume extraction.

These accessories may not look as impressive as a microscope or rework station, but they make everyday workshop work more organised.

11. Phone repair heating and separation equipment

If your business will handle screen replacement and device refurbishment, you may also need equipment for separating displays and handling adhesive-backed components.

Depending on the phones and procedures you support, this may include:

  • LCD separators.
  • Suitable heating equipment.
  • Screen opening tools.
  • Adhesive removal accessories.
  • Display handling tools.

Choose equipment according to the device models you intend to service. Different screens and assemblies require different handling methods and temperature controls.

Do not purchase specialised separation equipment simply because it is available. First establish whether screen replacement will be a significant part of your service offering.

12. What should you buy first?

This is where many new technicians make costly mistakes.

Buying every available tool at once can consume your starting capital before you’ve established which services generate consistent demand.

A more practical approach is to prioritise equipment in stages.

StageTools and equipmentPurpose
Basic repair toolkitScrewdrivers, opening tools, tweezers and basic hand toolsDevice opening and component handling
Electrical diagnosticsMultimeterElectrical measurements and fault investigation
Soldering capabilitySoldering station, flux and solder wireSuitable soldering repairs
Rework capabilityHot air rework station and PCB holderSuitable motherboard rework
Advanced diagnosticsDC power supplyControlled electrical testing
Precision motherboard workMicroscope and supporting workstationInspection and micro-soldering

This is a suggested purchasing sequence, not a rule. If your business specialises in motherboard repair, you may need to invest in a microscope and rework equipment earlier.

The right starting toolkit depends on your training, repair experience, budget and the services you intend to offer.

13. Don’t forget the business side of your toolkit

Having good equipment is only one part of running a successful phone repair business.

You also need to think about:

  • A clean and organised customer reception area.
  • Secure storage for customers’ devices.
  • A reliable process for recording repairs.
  • Clear pricing and communication.
  • Proper handling of customer data and device access.
  • A way to track parts and consumables.
  • A clear process for testing devices before returning them.

A technician may be excellent at repairing phones but still struggle if devices are misplaced, customer expectations are unclear or repair records are poorly managed.

Treat your workshop as a business, not just a collection of tools.

Frequently asked questions

What tools do I need to start a mobile phone repair business in Kenya?

Start with a precision screwdriver set, opening tools, tweezers, a multimeter and suitable basic repair accessories. Add soldering and hot air equipment according to the services you intend to offer.

Do I need a microscope when starting phone repairs?

Not necessarily. A microscope becomes particularly useful when you begin performing precision motherboard repairs and micro-soldering. If you mainly handle basic component replacement, you may prioritise other equipment first.

Should I buy a soldering station or hot air rework station first?

They perform different functions. Your choice should depend on the repairs you plan to handle. If your work involves a broad range of motherboard repairs, having both can provide greater flexibility.

Is a DC power supply necessary for phone repair?

It is useful for controlled electrical diagnostics, but it may not be an immediate requirement for someone starting with basic repairs. Its importance increases as you expand into board-level troubleshooting.

How much does it cost to start a phone repair business in Kenya?

There is no single starting figure because costs depend on the services offered, equipment quality, brands and whether you buy new or used tools. Build a list around your intended services and compare equipment before committing your capital.

Where can I buy mobile phone repair tools in Nairobi?

Mutesh Ventures Ltd supplies mobile phone repair tools and equipment in Nairobi CBD. You can explore its online catalogue or contact the team to enquire about equipment availability.

Build your toolkit around the repairs you want to perform

You don’t need the biggest workshop or the most expensive equipment to begin building a phone repair business.

You need the right tools for the work you understand, a sensible purchasing plan and the willingness to keep improving your skills.

Start with the essentials. Add diagnostic and motherboard repair equipment as your capabilities expand. Most importantly, buy tools that support the services your customers actually need.

For mobile phone repair tools and equipment in Nairobi, visit Mutesh Ventures or get in touch with the team.

Mutesh Ventures Ltd
Accra Towers, 7th Floor, Shop D3, Kenneth Matiba Road, Nairobi CBD, Kenya.
Phone: 0724 946 622
Email: contact@muteshventures.com
How to Set Up a Professional Mobile Phone Motherboard Repair Bench

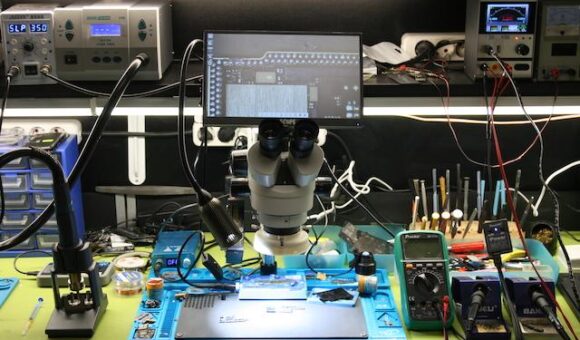
A professional mobile phone motherboard repair bench is more than a table covered with expensive equipment. It is a workspace where every tool has a purpose, essential equipment is within reach, and the technician can work comfortably without constantly searching for something.

Whether you’re upgrading an existing workshop or setting up your first serious micro-soldering station, the way you organise your bench can make a noticeable difference to your workflow.

You do not need to purchase every piece of equipment at once. Start with the tools that support the repairs you handle most often, then build your workstation as your skills and workload grow.

Here is how to put together a practical mobile phone motherboard repair bench.

1. Start with a suitable workbench

Before buying equipment, consider the space where you’ll be working.

Your bench should provide:

  • Enough surface area for a phone, motherboard and essential tools.
  • A stable surface that does not shake during precision work.
  • Adequate lighting.
  • Convenient access to power outlets.
  • Enough room to position a microscope and soldering equipment.
  • Storage for small components, screws and accessories.

A crowded bench makes it harder to work comfortably. You should be able to move your hands freely, position your equipment and inspect a motherboard without constantly shifting other items.

Keep the immediate working area clear and store equipment you use less frequently elsewhere.

2. Get a reliable soldering station

A soldering station is one of the central pieces of equipment on a motherboard repair bench.

It is used for tasks such as soldering wires, working on pads, replacing certain components and performing other precision soldering operations.

When choosing one, consider:

  • Stable and adjustable temperature control.
  • Suitable heat recovery for the work being performed.
  • Compatible soldering tips in different shapes and sizes.
  • A comfortable handpiece.
  • ESD considerations.
  • Availability of replacement tips and accessories.

The right soldering station depends on the type of repairs you handle and the components you work on.

For more guidance, read our article on how to choose a soldering station for mobile phone motherboard repair.

3. Add a hot air rework station

A hot air rework station provides controlled heated airflow for tasks such as removing and installing suitable surface-mount components.

It is an important addition to a motherboard repair bench, particularly when working with components that cannot conveniently be handled using a soldering iron alone.

When selecting a hot air station, pay attention to:

  • Temperature adjustment.
  • Airflow control.
  • Nozzle availability.
  • Handpiece comfort.
  • Heating performance.
  • Cooling and safety features.

Remember that temperature and airflow settings should be selected according to the component, board design and repair procedure. Excessive heat can damage nearby components and motherboard layers.

If you’re unsure which machine to buy, see our guide to choosing a hot air rework station for phone repair.

You can also compare the advantages of a 2-in-1 hot air and soldering station versus separate machines.

4. Make room for a microscope

If motherboard repair is a regular part of your work, a microscope is one of the most useful investments you can make.

It helps you inspect small components, solder joints, pads and other details that are difficult to see clearly with the naked eye.

When selecting one, consider:

  • Useful magnification range.
  • Image clarity.
  • Working distance.
  • Field of view.
  • Lighting.
  • Stand stability and adjustment.

A stereo microscope is popular for hands-on micro-soldering because it provides a three-dimensional view of the work area. A digital microscope may suit technicians who prefer viewing the board on a screen.

Do not choose purely by the highest advertised magnification. You need enough working space for your soldering tools and a clear view of the repair area.

Our guides explain which microscopes are suitable for motherboard repair and how stereo and digital microscopes compare.

5. Include a DC power supply for diagnostics

A bench DC power supply helps technicians investigate power-related faults and observe current consumption under controlled test conditions.

It can be useful when diagnosing certain power issues, but it must be connected using the correct model-specific procedure and suitable test connections.

Look for a unit with:

  • Adjustable voltage.
  • Adjustable current limit.
  • Clear voltage and current displays.
  • Constant-voltage and constant-current operation.
  • Appropriate protection features.
  • Stable output.

A 30V 5A unit offers greater rated capacity than a 15V 2A unit, but the right choice depends on the equipment’s intended applications and operating limits.

Read our guide to choosing a DC power supply for mobile phone repair before purchasing one.

For more practical information, see how to use a DC power supply when diagnosing phone charging problems.

6. Keep a quality multimeter within reach

A multimeter is essential for electrical measurements and fault investigation.

It helps technicians measure voltage, resistance and current, perform continuity checks and use diode-test functions when diagnosing suitable circuits.

When choosing one, consider:

  • Continuity testing.
  • Diode mode.
  • DC voltage measurement.
  • Resistance measurement.
  • Suitable measurement ranges.
  • Probe quality and input protection.
  • Accuracy and build quality.

A multimeter and a DC power supply perform different jobs. One does not replace the other.

Keep your multimeter and probes somewhere accessible so you can move between measurements and other repair procedures without interrupting your workflow.

Our guide to choosing the best multimeter for mobile phone repair explains what to look for.

7. Organise your PCB holders and motherboard clamps

A motherboard that moves around while you’re working makes precision soldering unnecessarily difficult.

PCB holders and motherboard clamps help secure boards during inspection, soldering and rework.

When selecting a holder, consider:

  • How securely it grips the board.
  • Whether it accommodates different board sizes.
  • Whether it allows convenient access to the repair area.
  • Whether it can be adjusted without excessive movement.
  • Whether its construction is suitable for repeated workshop use.

Choose a holder that supports your normal repair workflow without obstructing the microscope or soldering tools.

8. Add the small tools that make a big difference

The main machines are important, but a motherboard repair bench also depends on smaller tools and accessories.

Some of the essentials include:

Precision tweezers: Useful for handling small components, wires and other delicate parts.

Soldering tips: Different tip shapes support different soldering tasks. Keep suitable replacements available.

Solder wire: Choose an appropriate diameter and composition for the work being performed.

Soldering flux: Helps improve solder wetting and supports controlled soldering work. Select a suitable flux for the application.

Desoldering braid: Helps remove excess solder from suitable pads and connections.

Cleaning supplies: Appropriate cleaning materials help remove flux residues and keep the work area tidy.

Precision screwdrivers: Useful for opening devices and handling small screws.

ESD protection: Use suitable electrostatic-discharge precautions when handling sensitive electronic components.

You do not need a large collection of accessories on day one. Build your kit around the repairs you actually perform.

9. Invest in a proper soldering mat and workstation organisation

A suitable repair mat gives you a defined working surface and helps keep small components and tools organised.

Look for a mat that:

  • Provides enough working space.
  • Is suitable for the temperatures and repair processes involved.
  • Has compartments for small parts where useful.
  • Is easy to clean.
  • Works with your ESD-control arrangements.

Do not assume that every silicone mat provides electrostatic protection. Check the product’s specifications if ESD protection is required.

Keep frequently used tools within reach and return them to their designated positions after use.

10. Arrange your equipment for a smoother workflow

The physical arrangement of your workstation matters.

A useful starting layout is:

Workstation areaEquipment
Main inspection areaMicroscope, lighting and PCB holder
Soldering areaSoldering station, tips and accessories
Hot air areaRework station and suitable nozzles
Diagnostic areaDC power supply and multimeter
Tool storageTweezers, screwdrivers and small tools
Consumables areaFlux, solder wire, braid and cleaning materials

You can adjust this arrangement according to your bench size and whether you are right-handed or left-handed.

Keep hot equipment positioned safely, with enough clearance from cables, flammable materials and other tools.

Avoid placing cables where they can catch on your hands or pull equipment off the bench.

11. Don’t overlook ventilation, lighting and electrical safety

A professional workstation should also be comfortable and safe to use.

Ventilation: Soldering and rework can produce fumes. Use appropriate local fume extraction or ventilation rather than relying on an open window alone.

Lighting: Use sufficient illumination to inspect components without excessive glare.

Electrical safety: Use properly installed outlets, suitable power distribution and correctly rated equipment. Avoid overloaded extension leads and damaged cables.

Heat management: Keep hot-air handpieces and soldering irons in their designated stands when not in use.

ESD precautions: Use suitable grounding and ESD-control procedures when handling sensitive electronics.

A well-organised bench should protect both the technician and the devices being repaired.

12. Build your workstation in stages

You do not have to buy everything immediately. If you’re starting a repair business or upgrading an existing workshop, prioritise equipment according to the work you intend to handle.

StageEquipment to prioritise
Essential foundationSoldering station, multimeter, precision hand tools and repair mat
Motherboard repair setupMicroscope, PCB holder and hot air rework station
Diagnostic expansionDC power supply and additional testing accessories
Workshop refinementBetter lighting, fume extraction, storage and specialised tools

This is a practical purchasing sequence, not a strict rule. A technician who already performs board-level diagnostics may prioritise a DC power supply earlier, while another may need a microscope first.

The important thing is to purchase equipment that solves a real problem in your current workflow.

Frequently asked questions

What equipment do I need for a mobile phone motherboard repair bench?

A practical setup includes a soldering station, hot air rework station, microscope, multimeter, DC power supply, PCB holder, precision hand tools and suitable consumables. Ventilation, lighting and ESD precautions are also important.

Is a microscope necessary for motherboard repair?

For precision motherboard work and micro-soldering, a microscope is highly useful because it allows you to inspect small components and solder joints more clearly. The type and magnification you need depend on your repair tasks.

Do I need both a soldering station and a hot air rework station?

They perform different functions. A soldering station uses a heated tip, while a hot air station uses controlled heated airflow. Technicians who handle a broad range of motherboard repairs often benefit from having both.

Why do phone repair technicians use a DC power supply?

A DC power supply provides controlled power for suitable diagnostic procedures. It can help technicians investigate certain power-related faults and observe current consumption when connected using the correct test method.

How much does it cost to set up a motherboard repair bench in Kenya?

The cost depends on the quality, brand and number of tools you purchase. A basic setup costs less than a fully equipped micro-soldering workstation. It is sensible to compare specifications and prioritise equipment based on the repairs you intend to handle.

Where can I buy mobile phone motherboard repair tools in Nairobi?

Mutesh Ventures Ltd supplies mobile phone repair tools and equipment in Nairobi. You can explore its catalogue online or contact the team to enquire about available equipment.

Build a workstation that works as hard as you do

A good motherboard repair bench is built around the work you perform every day. Start with reliable essentials, organise your workspace properly and add specialised equipment as your repair capabilities expand.

Whether you’re replacing a soldering station, investing in a microscope or setting up a complete micro-soldering workstation, choose equipment that improves your workflow rather than buying specifications you may never use.

For mobile phone repair tools and equipment in Nairobi, visit Mutesh Ventures or get in touch with the team.

Mutesh Ventures Ltd
Accra Towers, 7th Floor, Shop D3, Kenneth Matiba Road, Nairobi CBD, Kenya.
Phone: 0724 946 622
Email: contact@muteshventures.com
How Much Microscope Magnification Do You Really Need for Micro-Soldering?

When you’re repairing a mobile phone motherboard, some of the components you’re working on are so small that inspecting them with the naked eye becomes difficult. A microscope makes the work easier, but choosing one raises an important question: how much magnification do you actually need for micro-soldering?

It is tempting to assume that a microscope with the highest magnification is automatically the best choice. In practice, that isn’t always true.

Too little magnification can make tiny components difficult to inspect. Too much magnification can restrict your field of view, make it harder to follow your soldering iron or hot air nozzle, and leave you constantly adjusting the microscope.

The goal is not to buy the microscope with the biggest number on its specification sheet. It is to find one that gives you a clear, comfortable view of the work you perform.

What magnification do you need for mobile phone micro-soldering?

For most mobile phone motherboard repair work, a microscope offering a useful working range of approximately 10× to 40× optical magnification is a practical starting point.

This is a general buying guideline, not a fixed requirement for every repair. The ideal magnification depends on the microscope’s optical design, the size of the components, your working distance and the level of detail you need to see.

A lower magnification can be useful when inspecting a larger section of the board, locating components and positioning tools. Higher magnification helps when examining small solder joints, fine-pitch connections and other tiny details.

What matters is having a clear image across a useful range, rather than relying on one maximum magnification figure.

Why maximum magnification isn’t everything

Imagine buying a microscope advertised as offering 100× magnification. That number might look impressive, but it doesn’t automatically mean you’ll have a better micro-soldering experience.

There are several reasons.

1. A wider field of view makes work easier

The field of view is the area you can see through the microscope at one time.

At lower magnification, you can usually see a larger section of the motherboard. This helps you locate components, understand their position and move around the board.

As magnification increases, the visible area generally becomes smaller.

If you can only see a tiny section of the board, you may find yourself constantly moving the motherboard to keep track of your work.

For everyday motherboard repairs, a useful field of view can be just as important as magnification.

2. Working distance determines how much room you have

Working distance is the space between the microscope’s objective lens and the surface you’re inspecting.

This is particularly important for micro-soldering because your hands, soldering iron, tweezers and hot air nozzle all need room to move.

A microscope may offer impressive magnification but still be uncomfortable to work under if the available space is too limited.

Before buying, consider whether the microscope provides enough clearance for your normal repair tools and board positioning.

3. Image clarity matters more than impressive numbers

A microscope should give you a sharp, well-defined image.

You need to distinguish small components, inspect solder joints and identify visible damage without constantly struggling to focus.

A high magnification figure cannot compensate for poor optical quality, weak lighting or an image that becomes blurry as you zoom in.

Look for consistent image clarity throughout the magnification range you expect to use.

Understanding the different magnification levels

The following table is a practical way to think about magnification when selecting a microscope for phone motherboard work. Actual results vary between microscope models.

Magnification rangeTypical use
Around 5×–10×General board inspection and locating components
Around 10×–20×Component inspection and routine precision work
Around 20×–40×Closer inspection of small solder joints and fine details
Above 40×Specialised close inspection where the optics and working setup support it

These ranges are indicative rather than universal. Some microscopes use different optical configurations, and advertised magnification may include digital enlargement.

The best choice is a microscope that lets you move between a wider view and a detailed view without sacrificing image quality or comfortable working space.

Optical magnification vs digital magnification

This distinction is especially important when comparing stereo and digital microscopes.

Optical magnification enlarges the image through the microscope’s optical system. It is the magnification produced by the lenses.

Digital magnification enlarges an image electronically, usually on a screen. It can make details appear bigger, but increasing the zoom does not necessarily reveal more genuine detail.

For example, a digital microscope may advertise a very high maximum zoom. However, the quality of the camera sensor, lens, screen resolution, lighting and image processing all influence what you can actually see.

Don’t compare a digital microscope’s advertised maximum zoom directly with the optical magnification of a stereo microscope. They are not necessarily measuring the same thing.

If you’re still deciding between these two microscope types, read our guide to stereo vs digital microscopes for phone repair.

What magnification is suitable for different repair tasks?

Different jobs require different levels of visual detail.

Inspecting a motherboard

When examining a board for corrosion, damaged components, missing parts or visible physical damage, a wider view is useful.

You need to understand the surrounding area rather than focus on one tiny point.

Inspecting solder joints

When checking solder joints, pads and component connections, increased magnification can help you examine the work more closely.

However, image clarity and lighting remain essential. A larger but blurry image won’t help you identify a problem accurately.

Micro-soldering small components

For precision work involving small components and fine-pitch connections, higher magnification may be useful.

You also need enough working distance to position your soldering iron, tweezers and other tools without constantly hitting the microscope.

Inspecting completed repairs

After soldering, you may need to inspect the repaired area for visible solder bridges, poor joints, displaced components or other signs of damage.

Being able to move between a wider view and a closer inspection makes this process more convenient.

Stereo microscope or digital microscope: which gives you a better working view?

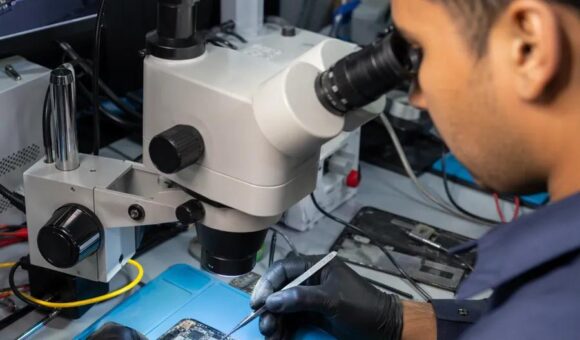
For hands-on micro-soldering, a stereo microscope is often a strong choice because it provides a natural three-dimensional view of the work area.

That depth perception can help when positioning tools and working with components at different heights.

A digital microscope offers a screen-based view, which some technicians prefer for comfort, demonstrations or sharing what they are working on.

Neither option is automatically better for every technician. Consider your preferred working position, image quality, available space and the type of repairs you perform.

Our article on choosing the best microscope for mobile phone motherboard repair explains the wider buying considerations.

Five things to check before buying a micro-soldering microscope

Before choosing a microscope, look beyond the magnification printed on the box.

1. Magnification range: Does it offer a useful range for both general inspection and close-up work?

2. Optical quality: Is the image sharp, clear and comfortable to view?

3. Working distance: Can you comfortably position your soldering iron, tweezers and other tools underneath it?

4. Lighting: Does the setup provide sufficient, adjustable illumination without excessive glare?

5. Stability and adjustment: Is the stand stable, and can you position the microscope comfortably over the motherboard?

If you’re building a more complete workstation, you should also consider the supporting equipment. Our guides to choosing a soldering station for motherboard repair and choosing a hot air rework station cover two other important parts of the setup.

Common microscope buying mistakes to avoid

A few purchasing mistakes can leave you with equipment that looks impressive but doesn’t suit your daily work.

  • Choosing the highest advertised magnification: A bigger number does not guarantee better image quality.
  • Ignoring working distance: You need room to work beneath the microscope.
  • Overlooking lighting: Poor illumination makes fine details harder to inspect.
  • Confusing digital zoom with optical magnification: The two are not directly interchangeable.
  • Buying without considering your repair tasks: A microscope for general inspection may not offer the working view you prefer for precision soldering.

A good microscope should make your work more comfortable and accurate, not turn every repair into an exercise in adjusting the equipment.

Where can you buy a microscope for mobile phone repair in Nairobi?

If you’re setting up or upgrading a phone repair workshop, Mutesh Ventures Ltd supplies mobile phone repair tools and equipment in Nairobi, Kenya.

You can explore the available equipment through the Mutesh Ventures catalogue or contact the team to enquire about microscope options and availability.

Mutesh Ventures Ltd
Accra Towers, 7th Floor, Shop D3, Kenneth Matiba Road, Nairobi CBD, Kenya.
Phone: 0724 946 622
Email: contact@muteshventures.com
Frequently asked questions

What is the best magnification for mobile phone micro-soldering?

A microscope with a useful working range around 10×–40× is a practical starting point for many motherboard repair tasks. The best range depends on the microscope’s optics, working distance and the components being inspected.

Is 40× magnification enough for micro-soldering?

It can be sufficient for many common phone motherboard tasks, provided the microscope delivers a clear image and gives you enough room to work. Some specialised jobs may benefit from higher magnification.

Is higher magnification always better?

No. Higher magnification generally reduces the field of view and can make positioning tools more difficult. Image clarity, working distance and a usable magnification range matter just as much.

What is the difference between optical and digital magnification?

Optical magnification enlarges the image through lenses. Digital magnification enlarges the image electronically on a screen. Digital zoom does not necessarily reveal additional detail.

Should I buy a stereo or digital microscope?

A stereo microscope provides a natural three-dimensional view that many technicians find useful for hands-on soldering. A digital microscope provides a screen-based view. Your preferred working style and the microscope’s actual image quality should guide the decision.

Does microscope lighting matter for micro-soldering?

Yes. Good lighting helps reveal component details, solder joints and visible board damage. Adjustable illumination is useful because reflective motherboard surfaces can create glare.

Final thoughts

The right microscope is not necessarily the one with the highest magnification. It is the one that gives you a clear view, enough working room and a comfortable way to inspect and repair small components.

For most phone repair technicians, a practical magnification range, good optics, suitable working distance and reliable lighting are a better combination than an impressive maximum zoom figure.

Choose for the work you actually do at the bench. That’s where the value of a microscope becomes clear.

Stereo or Digital Microscope for Phone Repair? Choose the Right View for the Job

When you’re repairing a smartphone motherboard, seeing the fault clearly is only half the job. You also need enough room to position your tweezers, soldering iron and other tools without fighting the microscope.

That is where the choice between a stereo microscope and a digital microscope becomes important.

Both can help mobile phone technicians inspect small components, solder joints and motherboard damage. However, they offer different working experiences. A stereo microscope gives you a natural three-dimensional view through eyepieces, while a digital microscope displays the magnified image on a screen.

So which one makes more sense for your repair bench?

For technicians who regularly perform micro-soldering and component-level repairs, a stereo microscope is often the more practical starting point. A digital microscope may be the better fit when screen viewing, recording or sharing images is a priority.

Let’s look at what actually matters before you spend money.

Stereo vs digital microscope: The differences at a glance

FeatureStereo microscopeDigital microscope
How you view the boardThrough eyepiecesOn a screen or monitor
Depth perceptionNatural 3D viewDepends on the imaging system
Tool positioningDirect view of the work areaRequires coordination with the screen image
Image and video captureMay need an attached cameraOften available, depending on model
Shared viewingRequires an additional camera or setupConvenient on a shared screen
Typical strengthHands-on precision workScreen-based inspection and documentation

The important question is not which technology sounds more advanced. It is which one lets you work comfortably and accurately.

1. Stereo microscopes: Why motherboard technicians often prefer them

Imagine trying to replace a tiny component on a crowded smartphone motherboard. You need to see the solder joints, judge the position of your tweezers and guide your soldering iron without losing track of the work area.

A stereo microscope makes this process more natural because you look directly through two optical eyepieces and see depth.

That three-dimensional view helps with tasks such as:

  • Inspecting solder joints and small components.
  • Positioning tweezers around delicate parts.
  • Working on connectors and fine-pitch components.
  • Examining corrosion and physical board damage.
  • Performing micro-soldering and component replacement.

Another important advantage is that the microscope can leave working space beneath the lens for your tools.

Where it makes the most sense: A repair bench where motherboard inspection and hands-on soldering are part of everyday work.

2. Digital microscopes: When the screen makes more sense

A digital microscope uses a camera to capture the magnified image and display it on a monitor or screen.

Instead of looking through eyepieces, you work while watching the screen.

This can be useful when you want to:

  • Display motherboard details on a larger monitor.
  • Capture photographs of damaged components.
  • Record repair procedures, depending on the model.
  • Demonstrate a repair to a trainee or colleague.
  • Inspect boards without continuously looking through eyepieces.

Digital microscopes can also make it easier for more than one person to view the same image.

However, screen size and advertised digital magnification can be misleading. A large image does not necessarily mean that the microscope provides better optical detail.

Check the camera resolution, lens quality, display performance and working distance before purchasing.

Where it makes the most sense: A workshop that values screen-based inspection, documentation, demonstrations or shared viewing.

3. The working-distance question: Will your tools fit?

This is one of the most overlooked microscope specifications.

Working distance is the space between the microscope’s objective lens and the motherboard being inspected.

Why does it matter?

Because a microscope is not useful for soldering if there is barely enough room to fit the motherboard, let alone your soldering iron and tweezers.

Before buying, check:

  • Whether your soldering iron can comfortably reach the board.
  • Whether tweezers can move freely beneath the lens.
  • Whether the motherboard holder fits under the microscope.
  • Whether the stand gives you enough height and positioning flexibility.
  • Whether the lens remains clear of your hands and tools.

Do not choose a microscope based on magnification alone. A comfortable working distance can make a bigger difference to your daily experience.

4. Magnification: More is not automatically better

It is tempting to choose the microscope with the highest advertised magnification. But extreme magnification can reduce your field of view and make it harder to position tools.

For motherboard work, you need a useful balance between detail and visibility.

Think about the work you perform:

  • Board inspection: You need enough field of view to locate components and examine larger sections.
  • Connector inspection: You need sufficient detail to examine pins and connections.
  • Micro-soldering: You need a clear image while retaining enough space to position tools.
  • Post-repair inspection: You need to examine solder joints and component placement.

Also distinguish between optical magnification and digital zoom. Digital zoom enlarges the image electronically; it does not necessarily reveal additional optical detail.

Ask to see the microscope working at the magnification you intend to use.

5. Lighting: The small detail that changes everything

A good microscope with poor lighting can still make repair work difficult.

Motherboard components, solder and metal surfaces can reflect light. Uneven illumination creates shadows, while excessive brightness can produce glare.

Look for:

  • Adjustable LED brightness.
  • Even lighting across the board.
  • Minimal glare on reflective surfaces.
  • A light source that does not obstruct your tools.
  • Comfortable illumination during longer repair sessions.

A ring light or suitable auxiliary LED lighting can improve visibility, depending on the microscope setup.

6. Which microscope should you buy?

Here is a practical way to make the decision.

Your priorityBetter starting point
Regular motherboard micro-solderingStereo microscope
Natural depth perceptionStereo microscope
Screen-based inspectionDigital microscope
Recording repair proceduresDigital microscope with recording support
Demonstrating work to traineesDigital microscope with a suitable monitor
Hands-on component positioningStereo microscope

There is no universal winner. A well-built microscope with suitable optics, working distance and lighting will serve you better than an impressive specification sheet that does not suit your workflow.

7. Build the rest of your repair bench around the microscope

A microscope does not work in isolation. If you are investing in precision motherboard repair, consider how the rest of your equipment will support it.

A practical setup may include:

  • Soldering station: For controlled soldering and component replacement.
  • Hot air rework station: For suitable component removal and installation.
  • DC power supply: For controlled power testing and current-consumption observation.
  • Digital multimeter: For voltage, resistance, continuity and diode testing.
  • PCB holder: To keep the motherboard stable.
  • Soldering mat: To organise and protect the work surface.

You can explore the related equipment guides:

Frequently asked questions

Is a stereo microscope better than a digital microscope for phone repair?

For hands-on motherboard repair and micro-soldering, a stereo microscope is often more practical because it provides natural depth perception. A digital microscope is useful for screen viewing, demonstrations and recording work.

Can I use a digital microscope for micro-soldering?

Yes, provided it offers sufficient image quality, working distance and stable display performance. Check that you can position your tools comfortably while watching the screen.

Why is a stereo microscope useful for motherboard repair?

It provides a three-dimensional optical view, helping technicians judge component position and work with small parts beneath the lens.

Does higher microscope magnification mean better quality?

No. Optical quality, resolution, working distance, lighting and field of view all matter. Very high magnification can make it harder to see the surrounding work area.

Can a digital microscope replace a stereo microscope?

It can replace one for some inspection and documentation tasks. However, technicians who depend on natural depth perception for hands-on precision work may still prefer a stereo microscope.

What should I check before buying a microscope for phone repair?

Check the optical quality, useful magnification range, working distance, lighting, stand stability and available workspace beneath the lens. If buying a digital microscope, also check the camera, monitor compatibility and display performance.

Choose microscope equipment that suits your repair work

The right microscope should make your work easier, not force you to change the way you repair phones.

If you spend most of your time performing motherboard-level repairs, prioritise a clear optical view, useful working distance and comfortable tool positioning. If you need to demonstrate, document or share your work, a suitable digital microscope may be a better fit.

Mutesh Ventures Ltd supplies mobile phone repair equipment and workshop tools in Kenya, including microscopes, soldering stations, power supplies, stencils and other repair essentials.

Explore the Mutesh Ventures equipment catalogue or contact the team to enquire about available microscopes and equipment for your workshop.

Mutesh Ventures Ltd
Accra Towers, 7th Floor, Shop D3, Kenneth Matiba Road, Nairobi CBD, Kenya
Phone: 0724 946 622
Email: contact@muteshventures.com
Best Microscopes for Mobile Phone Motherboard Repair: A Buyer’s Guide

A microscope is an essential tool for mobile phone technicians who perform motherboard repairs, micro-soldering and other precision electronics work. It provides magnification that makes it easier to inspect small components, solder joints, connectors and circuit-board damage that may be difficult to see with the naked eye.

The best microscope for phone repair depends on the type of work you perform, your budget, the magnification you need and how comfortably you can work under it.

For most technicians doing regular motherboard-level repairs, a stereo microscope is a practical choice because it provides depth perception and a three-dimensional view of the work area. Digital microscopes are also useful, particularly when you want to display and capture images on a screen.

This guide explains the main microscope types, features and buying considerations for mobile phone repair technicians in Kenya.

Why do mobile phone repair technicians need a microscope?

Modern smartphone motherboards contain small components packed closely together. Some faults are difficult to identify without magnification.

A microscope helps technicians:

  • Inspect small solder joints and component connections.
  • Identify corrosion and physical damage.
  • Examine connectors and fine-pitch components.
  • Position soldering tools more accurately during micro-soldering.
  • Inspect work after component replacement.
  • Examine PCB tracks and pads during motherboard repairs.

Magnification improves visibility, but it does not replace good lighting, proper soldering technique or electrical testing.

1. Understand the different types of microscopes

Not all microscopes are designed for the same work. The three common options to consider are stereo microscopes, digital microscopes and compound microscopes.

Stereo microscopes

A stereo microscope provides a three-dimensional view of the object being examined. This depth perception is useful when positioning soldering tools, handling small components and performing motherboard repairs.

Advantages include:

  • Depth perception for precision work.
  • A natural view through eyepieces.
  • Space to work with tools beneath the objective lens.
  • Suitability for component inspection and micro-soldering.

A stereo microscope is often a strong choice for technicians who spend significant time working directly on smartphone motherboards.

Digital microscopes

A digital microscope uses a camera and displays the magnified image on a monitor or screen.

Advantages include:

  • A larger viewing display.
  • Ability to capture photographs or video, depending on the model.
  • Convenient viewing for demonstrations and training.
  • Reduced need to look continuously through eyepieces.

However, some digital microscopes provide less natural depth perception than stereo microscopes. Check the working distance, image quality, latency and controls before buying one for precision soldering.

Compound microscopes

Compound microscopes use optical magnification to examine very small specimens, usually at higher magnifications.

They are useful in laboratory and scientific applications, but many conventional compound microscopes are less convenient for hands-on motherboard repair because they may not provide the working space needed for soldering tools.

For most phone repair benches, a stereo or suitable digital microscope is generally more practical.

2. How much magnification do you need?

Magnification is one of the first specifications technicians consider when choosing a microscope. However, higher magnification is not always better.

For motherboard repair, you need enough magnification to see small components clearly while retaining a useful field of view and sufficient working distance.

Consider these factors:

  • Low magnification: Provides a wider view for locating components and inspecting larger sections of a board.
  • Medium magnification: Useful for examining solder joints, connectors and small components.
  • Higher magnification: Helps inspect finer details, but reduces the visible area and can make positioning tools more difficult.

The useful magnification range depends on the microscope’s optics, objective lens, eyepieces and any additional lens or camera system.

Do not judge a microscope by its advertised maximum magnification alone. Ask to see the image at the magnification you intend to use.

3. Check the working distance

Working distance is the space between the microscope’s objective lens and the object being viewed.

This is especially important for mobile phone motherboard repair because you need room for soldering irons, tweezers, hot air tools and other accessories.

A microscope with insufficient working distance can make it difficult to position tools comfortably.

Before buying, consider:

  • Whether your soldering iron can reach the work area.
  • Whether tweezers and other tools fit beneath the lens.
  • Whether the microscope can accommodate the height of your motherboard holder.
  • Whether the lens provides enough clearance for your preferred repair technique.

A practical microscope should give you both a clear image and enough room to work.

4. Choose a microscope with suitable lighting

Good illumination is essential when examining motherboard components.

Poor lighting can create shadows, hide surface defects and make it difficult to distinguish small solder joints.

Look for a microscope that supports suitable LED illumination. Depending on the model, lighting may be built into the microscope or supplied through a separate ring light.

Useful considerations include:

  • Adjustable brightness.
  • Even illumination across the work area.
  • Minimal glare from reflective surfaces.
  • Lighting that does not produce distracting shadows.
  • A light source that remains comfortable during extended work.

Some technicians also use auxiliary lighting to improve visibility when working with reflective solder and metal components.

5. Optical microscope vs digital microscope: Which is better?

The choice depends on how you prefer to work.

FeatureStereo optical microscopeDigital microscope
Viewing methodEyepiecesScreen or monitor
Depth perceptionNatural stereoscopic viewDepends on camera and display system
Tool positioningDirect optical viewRequires attention to screen and tool position
Image captureDepends on camera attachmentOften supported
Shared viewingRequires additional setup or cameraConvenient on a shared screen
Best suited toHands-on precision repairInspection, demonstrations and documentation

For technicians who regularly perform micro-soldering, a stereo microscope is often a practical starting point. A digital microscope may be preferable if screen viewing and image capture are important to your workflow.

6. Check the stand and stability

A microscope is only as useful as the setup supporting it.

A stable stand helps keep the image steady while you work. Movement or vibration can make precise soldering more difficult.

Before purchasing, consider:

  • Stand stability.
  • Height adjustment.
  • Available workspace beneath the microscope.
  • Ease of positioning the viewing head.
  • Compatibility with your repair bench.
  • Whether the stand can accommodate the motherboard holders you use.

A boom stand may provide more flexibility for positioning equipment over a larger work area, while other stands may be more suitable for compact benches.

7. What else do you need for a microscope repair station?

A microscope works best as part of a properly organised motherboard repair bench.

Depending on the work you perform, consider combining it with:

  • Soldering station: For controlled soldering and component replacement.
  • Hot air rework station: For suitable component removal and installation.
  • DC power supply: For controlled power testing and current-consumption observation.
  • Digital multimeter: For voltage, resistance, continuity and diode testing.
  • PCB holder: To keep the motherboard stable during precision work.
  • Soldering mat: To organise the work area and provide a suitable bench surface.

For further equipment guidance, explore our related guides:

8. Common mistakes when buying a microscope

Choosing the highest advertised magnification: Maximum magnification alone does not determine image quality or suitability for soldering.

Ignoring working distance: A microscope may offer a clear image but leave too little room for your tools.

Overlooking lighting: Poor illumination can make precision work unnecessarily difficult.

Buying an unstable stand: Movement can interfere with accurate component handling.

Ignoring your repair workload: A technician who performs occasional inspections may not need the same setup as someone doing motherboard-level micro-soldering every day.

Choosing digital magnification without checking image quality: Confirm the actual image clarity, display performance and working distance rather than relying on advertised digital zoom.

Frequently asked questions

Which microscope is best for mobile phone motherboard repair?

A stereo microscope is a practical option for many motherboard repair technicians because it provides depth perception and working space for soldering tools. A suitable digital microscope is another option, particularly when screen viewing and image capture matter.

Is a digital microscope good for micro-soldering?

It can be, provided it offers a clear image, suitable working distance, stable display performance and comfortable tool positioning. Check whether its depth perception and viewing arrangement suit your repair technique.

How much magnification do I need for phone repair?

The appropriate magnification depends on the components and repair work. A useful microscope should allow you to inspect fine details while retaining enough field of view and working distance to position your tools.

Why is working distance important?

Working distance determines how much space is available between the microscope lens and the motherboard. Enough clearance is essential for using soldering irons, tweezers, hot air tools and motherboard holders.

Do I need a microscope for basic phone repairs?

Not every repair requires one. Screen replacements, battery replacements and some basic repairs may not need microscope-level inspection. However, motherboard troubleshooting and micro-soldering benefit significantly from magnification.

Can a microscope identify a short circuit?

No. A microscope helps you visually inspect a motherboard for damage, corrosion and component-related issues. Electrical tools such as multimeters and DC power supplies are needed to investigate electrical faults.

Find mobile phone repair microscopes in Nairobi

A suitable microscope can make a significant difference when working on small smartphone motherboard components. Choose a setup that provides clear magnification, sufficient working distance, stable positioning and good illumination.

Mutesh Ventures Ltd supplies mobile phone repair equipment and workshop tools in Kenya, including microscopes, soldering stations, power supplies, stencils, adhesives and other repair essentials.

Explore the Mutesh Ventures equipment catalogue or contact the team to enquire about available microscopes and suitable workshop equipment.

Mutesh Ventures Ltd
Accra Towers, 7th Floor, Shop D3, Kenneth Matiba Road, Nairobi CBD, Kenya
Phone: 0724 946 622
Email: contact@muteshventures.com
How to Use a DC Power Supply to Diagnose Mobile Phone Charging Problems

A DC power supply can help mobile phone repair technicians investigate charging problems by showing how a phone or compatible test circuit responds to a controlled power source. By observing voltage and current consumption, a technician can gather useful clues about power-related faults.

However, a DC power supply does not automatically identify a faulty charging port, battery, charging IC or motherboard component. Accurate diagnosis requires a systematic process and, where necessary, additional tools such as a multimeter.

This guide explains how technicians can use a DC bench power supply as part of a mobile phone charging diagnosis.

What can a DC power supply tell you about a charging problem?

A regulated DC power supply allows a technician to provide controlled power to a compatible test connection and observe the circuit’s current consumption.

This can help investigate:

  • Phones that do not power on.
  • Devices with abnormal current consumption.
  • Suspected motherboard short circuits.
  • Power-related faults following liquid damage.
  • Devices that show unusual behaviour during controlled power testing.

It is important to distinguish a charging fault from a general power fault. A phone that does not charge may have a damaged charging port, faulty cable, defective battery, charging circuit problem or motherboard fault. Power-supply testing is only one part of the investigation.

1. Inspect the phone before connecting a power supply

Start with a physical inspection. Do not immediately connect a bench supply to a phone that has a charging problem.

Check the following:

  • Inspect the charging port for dirt, corrosion, bent contacts or physical damage.
  • Look for signs of liquid damage.
  • Check the charging cable and adapter using known-good compatible accessories.
  • Inspect the battery for swelling or other visible damage.
  • Check whether the phone responds to a known-good charger.
  • Record any symptoms, including whether the phone vibrates, displays a charging icon or heats up.

A damaged or swollen battery should be handled appropriately. Do not attempt to charge or test a visibly damaged battery.

2. Understand where the DC power supply fits into diagnosis

A DC bench power supply is useful for controlled power testing, but it is not a universal replacement for a phone charger.

A technician may use a suitable power supply with an approved battery-terminal connection, test fixture or other model-specific diagnostic method.

Before connecting anything, confirm:

  • The correct connection points for the specific phone model.
  • The required voltage and polarity.
  • Whether the battery must be disconnected.
  • The manufacturer’s or repair procedure’s recommended current limits.
  • Whether the test method is appropriate for the device’s power-management design.

Never connect a bench supply directly to an unidentified charging port or apply an arbitrary voltage to a phone’s USB input. Use the correct charging protocol and suitable equipment for USB charging tests.

3. Set the correct voltage and current limit

Voltage and current settings must match the specific diagnostic procedure.

A power supply rated at 30V 5A does not mean a technician should apply 30 volts or allow 5 amps into a phone. Those figures describe the unit’s maximum rated capacity, not the correct settings for every device.

Before switching on the output:

  1. Confirm the phone model and the correct test procedure.
  2. Verify the required voltage and polarity.
  3. Set an appropriate current limit for the test.
  4. Check the leads and connections.
  5. Confirm the output settings before connecting the device.
  6. Enable the output only when the connection is correct.

If you are still choosing equipment, read our guide on how to choose a DC power supply for mobile phone repair. You can also compare the differences in 30V 5A vs 15V 2A DC power supplies.

4. Observe the current consumption

One useful feature of a bench power supply is its current display. During a suitable controlled test, the reading can help a technician understand how the connected circuit responds when power is applied.

The reading should always be interpreted in the context of the phone model, connection method and test procedure.

For example:

  • No current draw: May indicate an open connection, incorrect polarity, disconnected test point or a circuit that is not drawing power under the test conditions.
  • Unexpectedly high current draw: May indicate a short circuit or another abnormal load. Further testing is required to locate the cause.
  • Fluctuating current: May be associated with repeated startup attempts, an unstable connection or a circuit responding abnormally.
  • A stable reading: Does not automatically prove that the charging system is healthy. Additional checks may still be necessary.

These are diagnostic clues, not universal fault codes. Different phone models and test methods can produce different readings.

5. Use a multimeter to investigate the charging circuit

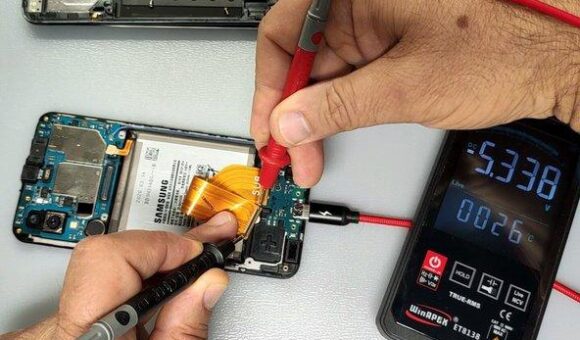
A multimeter complements a DC power supply by allowing technicians to perform electrical checks at specific points in a circuit.

Depending on the phone and the fault, a technician may check:

  • Charging-port connections.
  • Continuity through relevant circuit paths.
  • Voltage at specified test points.
  • Battery voltage using the correct procedure.
  • Suspected open circuits or short circuits.

Always use the correct meter mode and range. Never perform resistance or continuity measurements on an energised circuit.

A DC power supply helps provide controlled power and observe current consumption. A multimeter helps investigate specific electrical points. Using both appropriately provides a more complete diagnostic picture.

6. How to narrow down the cause of a charging problem

Charging faults can originate from different parts of the phone. Avoid replacing components based on a single symptom or current reading.

Possible faultWhat to investigate
Damaged charging portPhysical condition, connector pins and relevant circuit connections
Faulty charging cable or adapterTest with known-good compatible accessories
Defective batteryBattery condition and appropriate battery tests
Charging circuit faultRelevant charging-path components and voltage checks
Motherboard short circuitCurrent consumption and further board-level investigation
Liquid damageCorrosion, damaged components and affected circuit paths

The goal is to identify the faulty section before replacing parts. This reduces unnecessary component changes and helps avoid misdiagnosis.

7. Common mistakes when using a DC power supply

Applying the maximum rated voltage: A 30V supply should not be set to 30V simply because that is its maximum rating. Use the correct procedure and settings for the device.

Ignoring polarity: Incorrect positive and negative connections can damage electronic components.

Connecting directly to the charging port: A bench supply should not be connected arbitrarily to a USB input. Use appropriate charging equipment and test fixtures.

Treating every high-current reading as a short circuit: An unusual reading requires investigation. It is not proof of a specific failed component.

Ignoring the battery condition: A damaged or swollen battery should not be subjected to routine charging tests.

Skipping multimeter checks: Current consumption alone rarely provides enough information to identify the exact cause of a charging fault.

Frequently asked questions

Can a DC power supply diagnose a phone that is not charging?

It can help investigate power-related faults by providing controlled power through a suitable test connection and allowing the technician to observe current consumption. It does not independently identify every charging-system fault.

Can I connect a DC power supply directly to a phone charging port?

Not arbitrarily. A phone’s USB input may require specific charging protocols and protection circuitry. Use suitable charging equipment and model-appropriate test procedures.

What does zero current on a DC power supply mean?

It may indicate an open connection, incorrect polarity, an unsuitable test point or a circuit that is not drawing power under the test conditions. Further checks are needed before identifying the fault.

Does high current consumption mean a phone has a short circuit?

Not necessarily. Abnormally high current can indicate a short circuit or another fault, but the reading must be interpreted alongside the test setup and additional measurements.

Do I need both a DC power supply and a multimeter?

For many motherboard-level diagnostic tasks, both are useful. A bench supply provides controlled power and current readings, while a multimeter helps check voltage, resistance and continuity at specific circuit points.

Can a DC power supply replace a phone charger?

No. A bench supply is primarily a controlled electronics testing tool. It does not automatically reproduce the charging protocols and functions of a compatible phone charger.

Get mobile phone repair equipment in Nairobi

Accurate charging diagnosis requires the right equipment and a methodical approach. A regulated DC power supply, a reliable multimeter and suitable motherboard repair tools can help technicians investigate faults more effectively.

Mutesh Ventures Ltd supplies mobile phone repair equipment and workshop tools to technicians and repair businesses in Kenya.

Explore the Mutesh Ventures equipment catalogue or contact the team to enquire about available DC power supplies and other diagnostic equipment.

Mutesh Ventures Ltd
Accra Towers, 7th Floor, Shop D3, Kenneth Matiba Road, Nairobi CBD, Kenya
Phone: 0724 946 622
Email: contact@muteshventures.com
30V 5A vs 15V 2A DC Power Supply: Which One Do You Need?

If you are choosing between a 30V 5A and a 15V 2A DC power supply, the main difference is their maximum output capacity.

A 30V 5A unit can supply up to 30 volts and 5 amps within its rated operating limits. A 15V 2A unit is limited to 15 volts and 2 amps. The higher-rated option offers more flexibility for compatible electronics testing, but that does not automatically make it the right purchase for every technician.

For mobile phone repair, consider the diagnostic work you perform, the adjustment precision you need, the protection features available and your budget.

30V 5A vs 15V 2A: What is the difference?

Feature30V 5A power supply15V 2A power supply
Maximum voltage30V15V
Maximum current5A2A
Maximum theoretical output power150W30W
CapacityHigherLower
Suitable applicationsWider range of compatible electronics testingBasic and lower-power electronics testing
Workshop flexibilityGreaterMore limited
Typical considerationTechnicians needing more output capacityBeginners or technicians with simpler requirements

The maximum theoretical output power is calculated by multiplying voltage by current. Actual usable output depends on the power supply’s design and operating limits.

1. What does 30V 5A mean?

A 30V 5A DC power supply has a maximum rated output of 30 volts and 5 amps.

Its theoretical maximum output power is:

30V × 5A = 150W.

This gives the technician more output capacity for compatible electronic circuits and testing applications.

For a mobile phone repair workshop, a 30V 5A supply may be a practical choice if you handle motherboard diagnostics, work with different electronic devices or want equipment that can support a wider range of bench-testing tasks.

However, higher capacity does not mean you should apply 30 volts or 5 amps to a smartphone. Always follow the correct voltage and current settings for the specific device and diagnostic procedure.

2. What does 15V 2A mean?

A 15V 2A DC power supply has a maximum rated output of 15 volts and 2 amps.

Its theoretical maximum output power is:

15V × 2A = 30W.

It may be sufficient for basic electronics testing and applications that fall within its output limits.

For a beginner setting up a small repair bench, a 15V 2A supply may be a reasonable starting point if its specifications match the intended work.

The limitation is its lower output capacity. As your workshop takes on more varied electronics work, you may find that a higher-rated supply offers greater flexibility.

3. Which power supply is better for mobile phone motherboard repair?

For a technician who regularly handles motherboard diagnostics, a well-designed 30V 5A bench supply generally offers more flexibility than a basic 15V 2A model.

However, maximum output is only one consideration. Look for:

  • Adjustable voltage and current.
  • Accurate voltage and current readings.
  • Constant-voltage and constant-current modes.
  • Fine adjustment controls.
  • Appropriate short-circuit and overload protection.
  • Stable output and reliable construction.

A lower-rated supply with better control and accuracy may be more useful for a particular diagnostic task than a poorly designed higher-rated unit.

If you are still deciding which specifications matter most, read our guide on how to choose a DC power supply for mobile phone repair.

4. Does a 30V 5A power supply force more current into a phone?

No. A power supply rated at 5A does not automatically push 5 amps into every connected device.

The current drawn depends on the connected load, the applied voltage and the circuit’s electrical characteristics. The current-limit setting determines the maximum current the supply is allowed to deliver under its operating conditions.

This distinction is important for phone repair. A technician must select the correct voltage and current limit for the specific test rather than relying on the maximum ratings printed on the machine.

Incorrect settings or polarity can damage sensitive components.

5. Which one should a beginner buy?

If you are starting a phone repair workshop, your choice should depend on the work you intend to handle.

A 15V 2A supply may be adequate for basic, lower-power testing. It can help you get started without immediately investing in a higher-capacity unit.

A 30V 5A supply is worth considering if you expect to handle more varied electronics work and want additional output capacity.

Before purchasing either model, compare its accuracy, protection features, controls, warranty and build quality. Do not make the decision based on voltage and amperage alone.

6. Is a 30V 5A supply always worth the extra cost?

Not necessarily.

If your work only requires applications within the limits of a 15V 2A supply, paying more for a 30V 5A model may not deliver much practical value.

On the other hand, if your workshop handles different electronics and more demanding bench-testing tasks, the additional capacity can make the higher-rated model a more useful long-term investment.

Think about the repairs you currently perform and the services you plan to introduce. Buy equipment that supports those requirements rather than paying for specifications you will rarely use.

7. Other equipment to consider for your diagnostic bench

A DC power supply is only one part of a mobile phone repair workstation.

Depending on the repairs you perform, you may also need:

  • A reliable multimeter for checking voltage, resistance and continuity.
  • A soldering station for component-level repair.
  • A hot air rework station for suitable component removal and installation.
  • A microscope for inspecting small components and solder joints.
  • Suitable motherboard holders and work mats.

For related buying advice, explore:

You can also explore the Mutesh Ventures equipment catalogue for repair tools and workshop equipment.

Frequently asked questions

Is 30V 5A better than 15V 2A?

A 30V 5A supply offers higher maximum voltage, current and theoretical output power. It is more flexible for compatible applications, but the best option depends on your actual testing requirements.

Can I use a 30V 5A power supply for mobile phone repair?

Yes, a suitable regulated 30V 5A bench supply can be used for mobile phone repair diagnostics. Always select the correct output settings for the device and test procedure. Never apply the maximum rated output indiscriminately.

Is 15V 2A enough for phone repair?

It can be sufficient for some basic and lower-power electronics testing. Whether it is adequate for your phone repair work depends on the procedures and equipment you intend to use.

How do I calculate the wattage of a DC power supply?

Multiply the maximum voltage by the maximum current. For example, 30V × 5A gives 150W, while 15V × 2A gives 30W. This is the theoretical maximum based on the stated ratings.

Should I buy a 30V 5A power supply if I am a beginner?

It can be a good investment if you have the budget and expect to handle a wider range of electronics work. However, learn correct voltage selection, polarity and current limiting before using it on sensitive circuits.

Find mobile phone repair equipment in Nairobi

Whether you need a basic bench supply or a higher-capacity model, choose equipment that supports the work you perform and gives you reliable control during diagnostics.

Mutesh Ventures Ltd supplies mobile phone repair equipment and tools to technicians, repair shops and electronics businesses in Kenya.

Visit Mutesh Ventures to explore the available equipment or contact the team to enquire about DC power supply models and current availability.

Mutesh Ventures Ltd
Accra Towers, 7th Floor, Shop D3, Kenneth Matiba Road, Nairobi CBD, Kenya
Phone: 0724 946 622
Email: contact@muteshventures.com
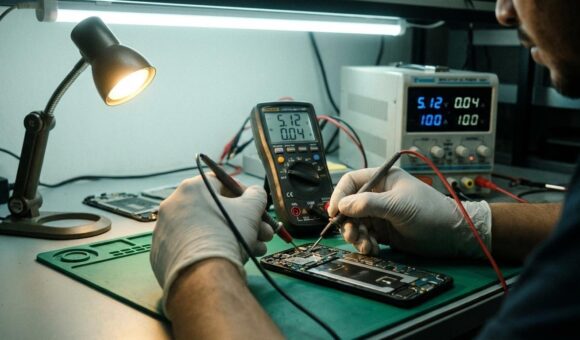
Search products
Back to Top
Product has been added to your cart
Compare (0)