

How to Set Up a Professional Mobile Phone Motherboard Repair Bench
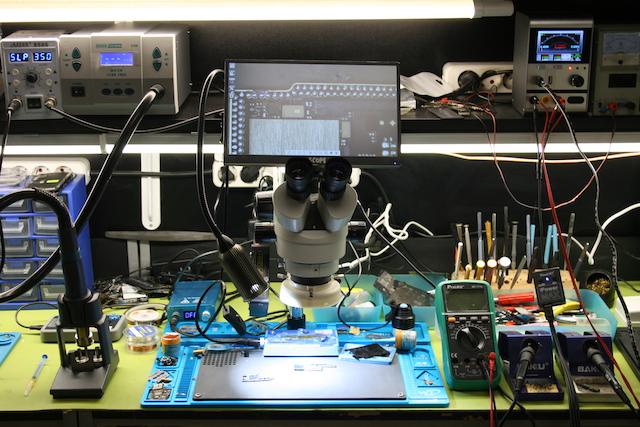
A professional mobile phone motherboard repair bench is more than a table covered with expensive equipment. It is a workspace where every tool has a purpose, essential equipment is within reach, and the technician can work comfortably without constantly searching for something.
Whether you’re upgrading an existing workshop or setting up your first serious micro-soldering station, the way you organise your bench can make a noticeable difference to your workflow.
You do not need to purchase every piece of equipment at once. Start with the tools that support the repairs you handle most often, then build your workstation as your skills and workload grow.
Here is how to put together a practical mobile phone motherboard repair bench.
1. Start with a suitable workbench
Before buying equipment, consider the space where you’ll be working.
Your bench should provide:
- Enough surface area for a phone, motherboard and essential tools.
- A stable surface that does not shake during precision work.
- Adequate lighting.
- Convenient access to power outlets.
- Enough room to position a microscope and soldering equipment.
- Storage for small components, screws and accessories.
A crowded bench makes it harder to work comfortably. You should be able to move your hands freely, position your equipment and inspect a motherboard without constantly shifting other items.
Keep the immediate working area clear and store equipment you use less frequently elsewhere.
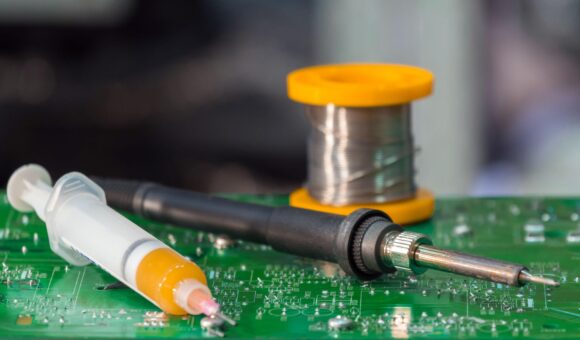
2. Get a reliable soldering station
A soldering station is one of the central pieces of equipment on a motherboard repair bench.
It is used for tasks such as soldering wires, working on pads, replacing certain components and performing other precision soldering operations.
When choosing one, consider:
- Stable and adjustable temperature control.
- Suitable heat recovery for the work being performed.
- Compatible soldering tips in different shapes and sizes.
- A comfortable handpiece.
- ESD considerations.
- Availability of replacement tips and accessories.
The right soldering station depends on the type of repairs you handle and the components you work on.
For more guidance, read our article on how to choose a soldering station for mobile phone motherboard repair.
3. Add a hot air rework station
A hot air rework station provides controlled heated airflow for tasks such as removing and installing suitable surface-mount components.
It is an important addition to a motherboard repair bench, particularly when working with components that cannot conveniently be handled using a soldering iron alone.
When selecting a hot air station, pay attention to:
- Temperature adjustment.
- Airflow control.
- Nozzle availability.
- Handpiece comfort.
- Heating performance.
- Cooling and safety features.
Remember that temperature and airflow settings should be selected according to the component, board design and repair procedure. Excessive heat can damage nearby components and motherboard layers.
If you’re unsure which machine to buy, see our guide to choosing a hot air rework station for phone repair.
You can also compare the advantages of a 2-in-1 hot air and soldering station versus separate machines.
4. Make room for a microscope
If motherboard repair is a regular part of your work, a microscope is one of the most useful investments you can make.
It helps you inspect small components, solder joints, pads and other details that are difficult to see clearly with the naked eye.
When selecting one, consider:
- Useful magnification range.
- Image clarity.
- Working distance.
- Field of view.
- Lighting.
- Stand stability and adjustment.
A stereo microscope is popular for hands-on micro-soldering because it provides a three-dimensional view of the work area. A digital microscope may suit technicians who prefer viewing the board on a screen.
Do not choose purely by the highest advertised magnification. You need enough working space for your soldering tools and a clear view of the repair area.
Our guides explain which microscopes are suitable for motherboard repair and how stereo and digital microscopes compare.
5. Include a DC power supply for diagnostics
A bench DC power supply helps technicians investigate power-related faults and observe current consumption under controlled test conditions.
It can be useful when diagnosing certain power issues, but it must be connected using the correct model-specific procedure and suitable test connections.
Look for a unit with:
- Adjustable voltage.
- Adjustable current limit.
- Clear voltage and current displays.
- Constant-voltage and constant-current operation.
- Appropriate protection features.
- Stable output.
A 30V 5A unit offers greater rated capacity than a 15V 2A unit, but the right choice depends on the equipment’s intended applications and operating limits.
Read our guide to choosing a DC power supply for mobile phone repair before purchasing one.
For more practical information, see how to use a DC power supply when diagnosing phone charging problems.
6. Keep a quality multimeter within reach
A multimeter is essential for electrical measurements and fault investigation.
It helps technicians measure voltage, resistance and current, perform continuity checks and use diode-test functions when diagnosing suitable circuits.
When choosing one, consider:
- Continuity testing.
- Diode mode.
- DC voltage measurement.
- Resistance measurement.
- Suitable measurement ranges.
- Probe quality and input protection.
- Accuracy and build quality.
A multimeter and a DC power supply perform different jobs. One does not replace the other.
Keep your multimeter and probes somewhere accessible so you can move between measurements and other repair procedures without interrupting your workflow.
Our guide to choosing the best multimeter for mobile phone repair explains what to look for.
7. Organise your PCB holders and motherboard clamps
A motherboard that moves around while you’re working makes precision soldering unnecessarily difficult.
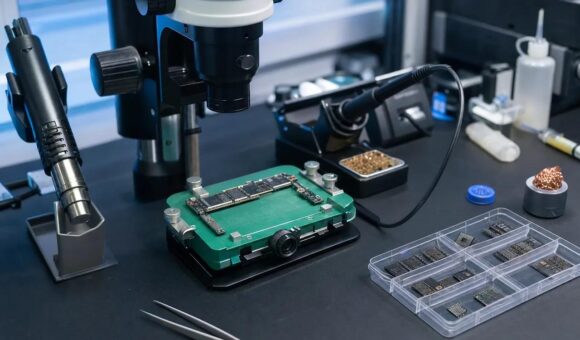
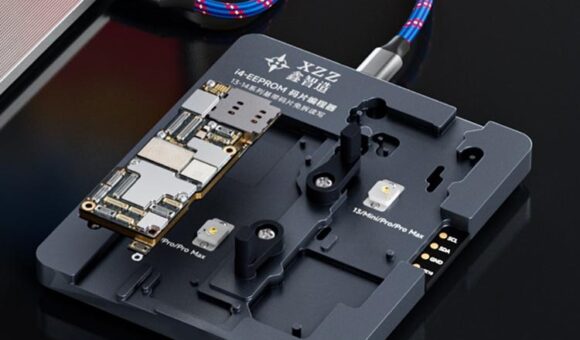
PCB holders and motherboard clamps help secure boards during inspection, soldering and rework.
When selecting a holder, consider:
- How securely it grips the board.
- Whether it accommodates different board sizes.
- Whether it allows convenient access to the repair area.
- Whether it can be adjusted without excessive movement.
- Whether its construction is suitable for repeated workshop use.
Choose a holder that supports your normal repair workflow without obstructing the microscope or soldering tools.
8. Add the small tools that make a big difference
The main machines are important, but a motherboard repair bench also depends on smaller tools and accessories.
Some of the essentials include:
Precision tweezers: Useful for handling small components, wires and other delicate parts.
Soldering tips: Different tip shapes support different soldering tasks. Keep suitable replacements available.
Solder wire: Choose an appropriate diameter and composition for the work being performed.
Soldering flux: Helps improve solder wetting and supports controlled soldering work. Select a suitable flux for the application.
Desoldering braid: Helps remove excess solder from suitable pads and connections.
Cleaning supplies: Appropriate cleaning materials help remove flux residues and keep the work area tidy.
Precision screwdrivers: Useful for opening devices and handling small screws.
ESD protection: Use suitable electrostatic-discharge precautions when handling sensitive electronic components.
You do not need a large collection of accessories on day one. Build your kit around the repairs you actually perform.
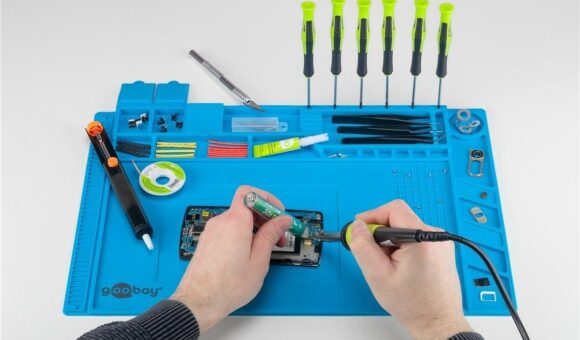
9. Invest in a proper soldering mat and workstation organisation
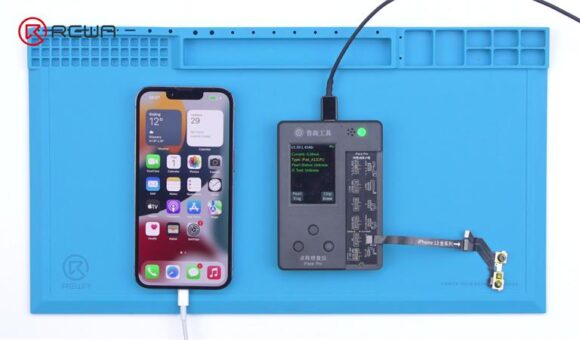
A suitable repair mat gives you a defined working surface and helps keep small components and tools organised.
Look for a mat that:
- Provides enough working space.
- Is suitable for the temperatures and repair processes involved.
- Has compartments for small parts where useful.
- Is easy to clean.
- Works with your ESD-control arrangements.
Do not assume that every silicone mat provides electrostatic protection. Check the product’s specifications if ESD protection is required.
Keep frequently used tools within reach and return them to their designated positions after use.
10. Arrange your equipment for a smoother workflow
The physical arrangement of your workstation matters.
A useful starting layout is:
| Workstation area | Equipment |
|---|---|
| Main inspection area | Microscope, lighting and PCB holder |
| Soldering area | Soldering station, tips and accessories |
| Hot air area | Rework station and suitable nozzles |
| Diagnostic area | DC power supply and multimeter |
| Tool storage | Tweezers, screwdrivers and small tools |
| Consumables area | Flux, solder wire, braid and cleaning materials |
You can adjust this arrangement according to your bench size and whether you are right-handed or left-handed.
Keep hot equipment positioned safely, with enough clearance from cables, flammable materials and other tools.
Avoid placing cables where they can catch on your hands or pull equipment off the bench.
11. Don’t overlook ventilation, lighting and electrical safety
A professional workstation should also be comfortable and safe to use.
Ventilation: Soldering and rework can produce fumes. Use appropriate local fume extraction or ventilation rather than relying on an open window alone.
Lighting: Use sufficient illumination to inspect components without excessive glare.
Electrical safety: Use properly installed outlets, suitable power distribution and correctly rated equipment. Avoid overloaded extension leads and damaged cables.
Heat management: Keep hot-air handpieces and soldering irons in their designated stands when not in use.
ESD precautions: Use suitable grounding and ESD-control procedures when handling sensitive electronics.
A well-organised bench should protect both the technician and the devices being repaired.
12. Build your workstation in stages
You do not have to buy everything immediately. If you’re starting a repair business or upgrading an existing workshop, prioritise equipment according to the work you intend to handle.
| Stage | Equipment to prioritise |
|---|---|
| Essential foundation | Soldering station, multimeter, precision hand tools and repair mat |
| Motherboard repair setup | Microscope, PCB holder and hot air rework station |
| Diagnostic expansion | DC power supply and additional testing accessories |
| Workshop refinement | Better lighting, fume extraction, storage and specialised tools |
This is a practical purchasing sequence, not a strict rule. A technician who already performs board-level diagnostics may prioritise a DC power supply earlier, while another may need a microscope first.
The important thing is to purchase equipment that solves a real problem in your current workflow.
Frequently asked questions
What equipment do I need for a mobile phone motherboard repair bench?
A practical setup includes a soldering station, hot air rework station, microscope, multimeter, DC power supply, PCB holder, precision hand tools and suitable consumables. Ventilation, lighting and ESD precautions are also important.
Is a microscope necessary for motherboard repair?
For precision motherboard work and micro-soldering, a microscope is highly useful because it allows you to inspect small components and solder joints more clearly. The type and magnification you need depend on your repair tasks.
Do I need both a soldering station and a hot air rework station?
They perform different functions. A soldering station uses a heated tip, while a hot air station uses controlled heated airflow. Technicians who handle a broad range of motherboard repairs often benefit from having both.
Why do phone repair technicians use a DC power supply?
A DC power supply provides controlled power for suitable diagnostic procedures. It can help technicians investigate certain power-related faults and observe current consumption when connected using the correct test method.
How much does it cost to set up a motherboard repair bench in Kenya?
The cost depends on the quality, brand and number of tools you purchase. A basic setup costs less than a fully equipped micro-soldering workstation. It is sensible to compare specifications and prioritise equipment based on the repairs you intend to handle.
Where can I buy mobile phone motherboard repair tools in Nairobi?
Mutesh Ventures Ltd supplies mobile phone repair tools and equipment in Nairobi. You can explore its catalogue online or contact the team to enquire about available equipment.
Build a workstation that works as hard as you do
A good motherboard repair bench is built around the work you perform every day. Start with reliable essentials, organise your workspace properly and add specialised equipment as your repair capabilities expand.
Whether you’re replacing a soldering station, investing in a microscope or setting up a complete micro-soldering workstation, choose equipment that improves your workflow rather than buying specifications you may never use.
For mobile phone repair tools and equipment in Nairobi, visit Mutesh Ventures or get in touch with the team.
Mutesh Ventures Ltd
Accra Towers, 7th Floor, Shop D3, Kenneth Matiba Road, Nairobi CBD, Kenya.
Phone: 0724 946 622
Email: contact@muteshventures.com
Add a review
Your email address will not be published. Required fields are marked *